
Jetbrains intellij download - pity
What’s New in IntelliJ IDEA 2022.2
IntelliJ IDEA 2022.2 includes multiple quality improvements to the remote development functionality, making it sleeker and more stable. As of v2022.2, IntelliJ IDEA uses JetBrains Runtime 17, which enhances the IDE experience and performance in many ways. IntelliJ IDEA Ultimate adds support for Spring 6 and Spring Boot 3 features and introduces updates for several other frameworks. The new version provides many other noteworthy upgrades and refinements that are covered in detail below.
Key updates
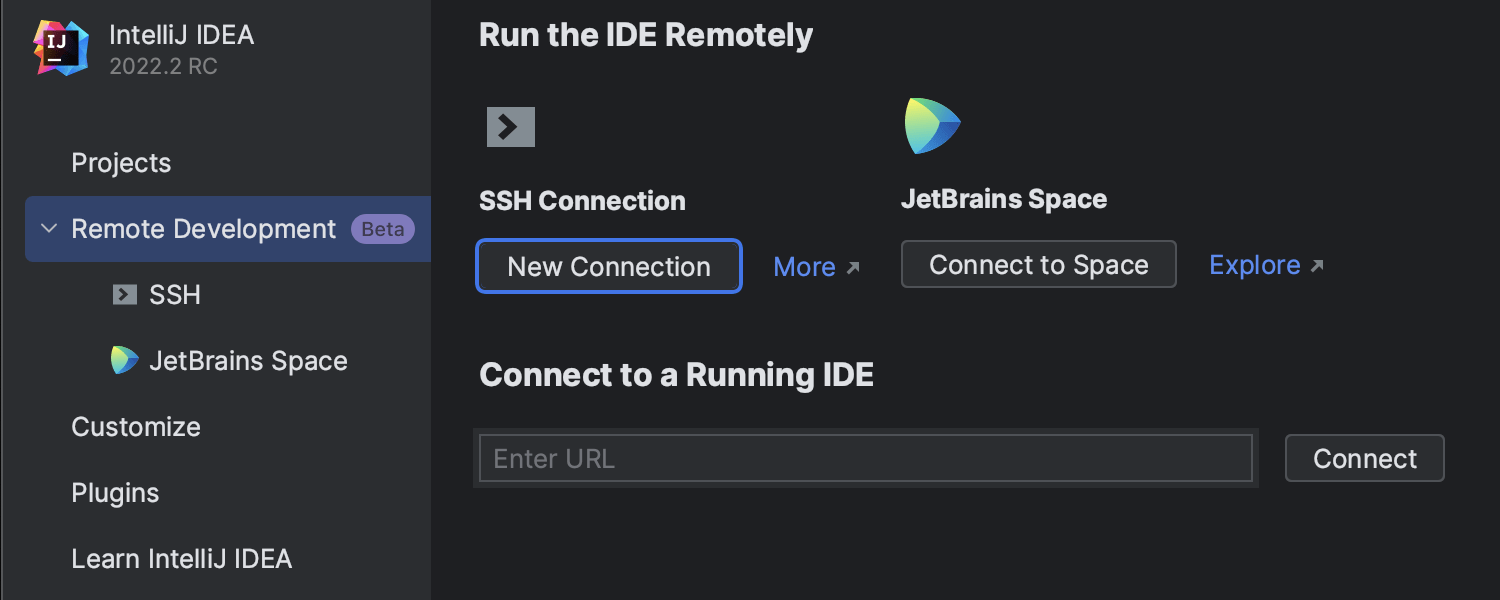
Remote development improvements
We have introduced a large number of major upgrades to remote development in IntelliJ IDEA 2022.2 to make your experience more stable and feature-rich. Newly released updates bring various quality improvements. Connect your laptop via SSH to IntelliJ IDEA installed on a remote server and get a fluid developer experience. If you’re using JetBrains Space to orchestrate the backends efficiently with the new version, you can manage your dev environments directly from IntelliJ IDEA. Learn more in this blog post.
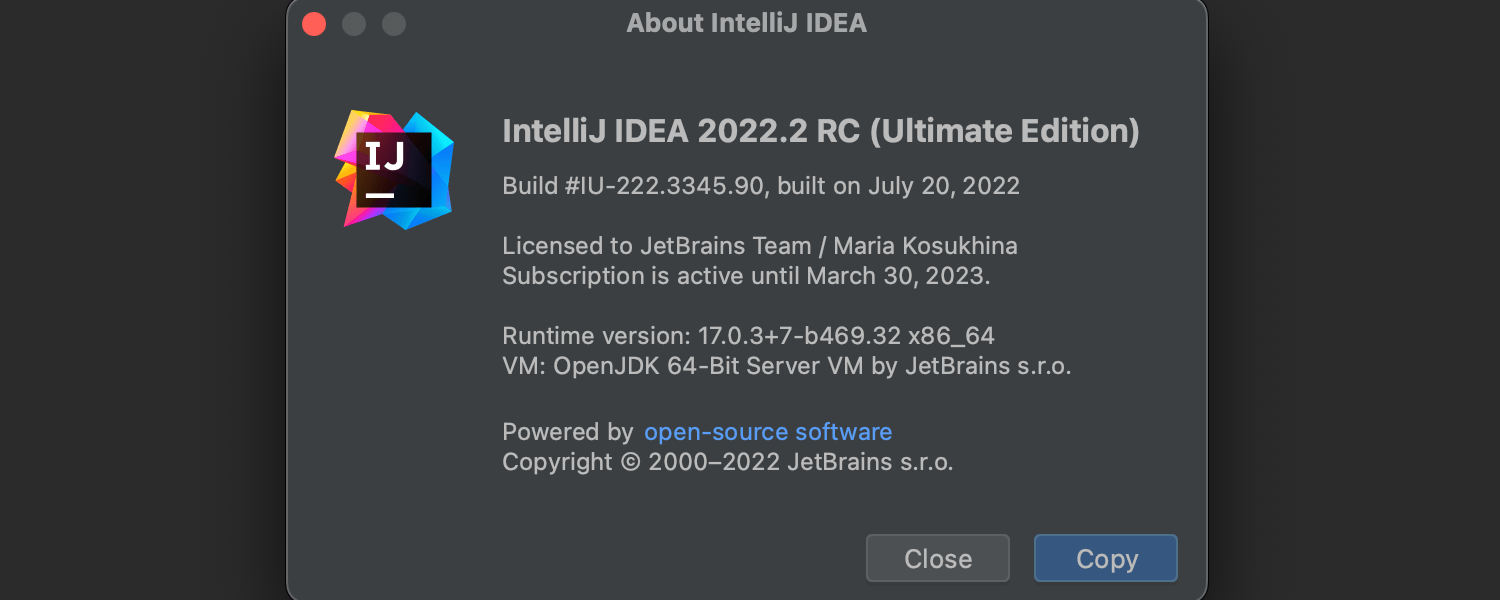
The switch from JBR 11 to JBR 17
As of v2022.2, all IntelliJ IDEA updates come with JetBrains Runtime 17 (JBR 17), which brings a significant IDE performance improvement, better security, enhanced rendering performance on macOS thanks to the Metal API, and more. Read this blog post for more details.
Support for Spring 6 and Spring Boot 3 features
IntelliJ IDEA 2022.2 now fully supports Spring 6 and Spring Boot 3 features, including new classes and classes with the new constructor-binding syntax without explicit . Do not forget to update the IDE if you want to try Spring 6 or switch your projects to this new version.
User Experience
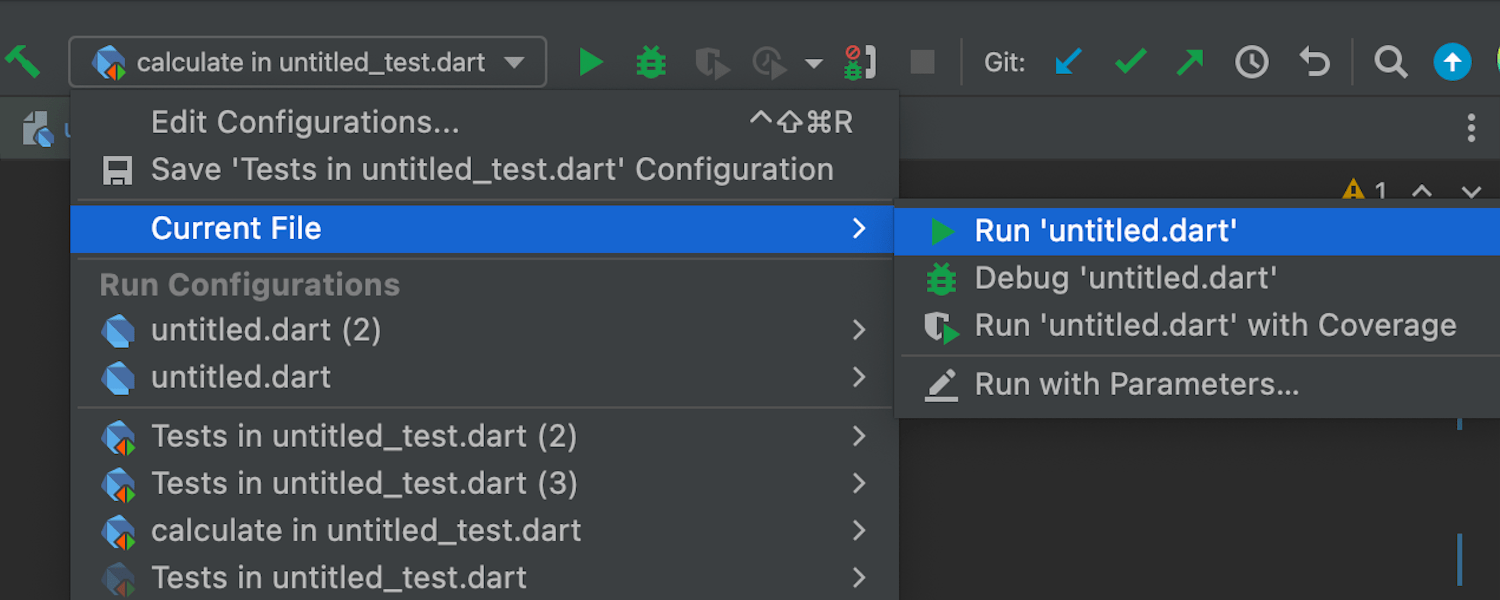
Run Current File
To make it easier to run and debug single files without having a dedicated run configuration, we’ve introduced the new Run Current File functionality available from the Run/Debug widget. With its help, you can run and debug the file you currently have open, and the IDE will automatically use the run configuration type best suited for this file.
Keyboard shortcut to change font size globally
There’s a new keyboard shortcut that changes the font size everywhere in the editor. To increase the font size, press . To decrease it, press . Also, there is now a font size indicator showing the current font size along with the option to revert it back to the default.
Merge All Project Windows action on macOS
For macOS, we’ve introduced the ability to organize your working space by merging all opened project windows into one, turning each window into its own tab. To perform this action go to Window
Install plugins
Plugins extend the core functionality of IntelliJ IDEA. For example, install plugins to get the following features:
Integration with version control systems, issue trackers, build management servers, and other tools.
Coding assistance support for various languages and frameworks.
Shortcut hints, live previews, File Watchers, and so on.
Coding exercises that can help you to learn a new programming language.
Open plugin settings
Press to open the IDE settings and select .

Use the Marketplace tab to browse and install plugins from the JetBrains Plugin Repository or from a custom plugin repository.
Use the Installed tab to browse bundled and installed plugins, enable, disable, update, or remove them. Disabling unnecessary plugins can increase performance.
Most plugins can be used with any JetBrains product. Some are limited only to commercial products, others require a separate license.
If a plugin depends on some other plugin, IntelliJ IDEA will notify you about the dependencies. If your project depends on certain plugins, add them to the list of required plugins.
If existing plugins do not provide some functionality that you need, you can create your own plugin for IntelliJ IDEA. For more information, see Develop your own plugins.
By default, IntelliJ IDEA includes several bundled plugins. You can disable bundled plugins, but they cannot be removed. You can install additional plugins from the plugin repository or from a local archive file (ZIP or JAR).
Install plugin from Marketplace
Press to open the IDE settings and select .
Find the plugin in the Marketplace and click Install.
To install a specific version, go to the plugin page in the JetBrains Plugin Repository, download and install it as described in Install plugin from disk. For example, you can do it if the most recent version of the plugin is broken.
Install plugin from disk
Download the plugin archive (ZIP or JAR).
Press to open the IDE settings and select .
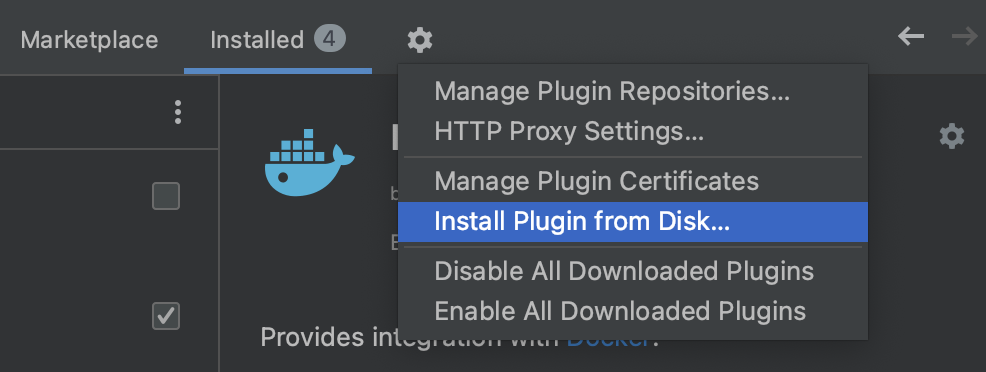
On the Plugins page, click
 and then click Install Plugin from Disk….
Select the plugin archive file and click OK.
Click OK to apply the changes and restart the IDE if prompted.
Install plugin through command line
From the JetBrains Marketplace page, find a page of the required plugin, select the Versions tab, and click any version to copy .

is a short name of the plugin you want to install.
For example, .
Open the terminal, go to the IntelliJ IDEA instance where your project resides, and for which you want to download and install a third-party plugin.
The downloaded IntelliJ IDEA instances are located in of the following directories depending on your OS.
Use the to install your plugin.
Remove plugin
You cannot remove bundled plugins.
Press to open the IDE settings and select .
Open the Installed tab and find the plugin that you want to remove.
Click
on the plugin's description pane and select Uninstall.
If you need to remove a plugin without launching IntelliJ IDEA, you can delete it manually from the plugin directory.
Disable plugin
You can disable a plugin without removing it if you do not need the corresponding functionality.
Press to open the IDE settings and select .
Open the Installed tab, find and select the plugin that you want to disable.
Click
on the plugin's description pane and select Disable.Alternatively, you can use the checkboxes in the list of plugins or the Disable all buttons for plugin categories.
You can disable or enable all manually installed plugins at once (non-bundled) in the menu under .

Required plugins
A project may require plugins that provide support for certain technologies or frameworks. You can add such plugins to the list of required plugins for the current project, so that IntelliJ IDEA will verify that the plugins are installed and enabled. It will notify you if you forget about some plugin, or someone on your team is not aware about the dependency as they work on the project.
Add a required plugin for your current project
Make sure the required plugin is installed.
Press to open the IDE settings and select .
On the Required Plugins page, click
 and select the plugin. Optionally, specify the minimum and maximum version of the plugin.
To specify the required version of IntelliJ IDEA itself, add IDE Core to the list of required plugins.
When you open the project in IntelliJ IDEA, it will notify you if the plugin is disabled, not installed, or requires an update.
Click the link in the notification message to quickly enable, install, or update the required plugin.
Suggested plugins
When you open a project, IntelliJ IDEA can suggest installing and enabling plugins based on libraries and facets used in your project. Do not confuse suggested plugins with required plugins that you can manually add to a project so that your teammates also use it.
If you don't need a particular plugin, you can prevent IntelliJ IDEA from suggesting it. You can also use your notification settings to disable or enable notifications of all plugin suggestions and the way they are displayed.
Disable suggestions of a plugin
When a notification of a suggested plugin appears, click Don't suggest this plugin.
Next time when you open a project, IntelliJ IDEA will not suggest this plugin. You can still check your project for suggested plugins.
Check a project for suggested plugins
Press and start typing Check Suggested Plugins.
Select the Check Suggested Plugins action.

If IntelliJ IDEA has a plugin applicable to your project, you'll see the notification message. Click the link in the notification message to install or enable the suggested plugin.
Develop your own plugins
You can use any edition of IntelliJ IDEA to develop plugins. It provides an open API, a dedicated SDK, module, and run/debug configurations to help you.
The recommended workflow is to use Gradle. The old workflow using the internal IntelliJ IDEA build system is also supported. For more information, see the IntelliJ Platform SDK Developer Guide.
Custom plugin repositories
By default, IntelliJ IDEA is configured to use plugins from the JetBrains Plugin Repository. This is a public repository where everyone can host their plugins. However, if you develop plugins for internal use only, you can set up a custom plugin repository for them.
For information about setting up a custom plugin repository, see the IntelliJ Platform SDK documentation.
Once you set up your plugin repository, add it to IntelliJ IDEA:
Add custom repositories
Press to open the IDE settings and select .
On the Plugins page, click
and select Manage Plugin Repositories….In the Custom Plugin Repositories dialog, click
and specify your repository URL. It must point to the location of the XML file that describes your plugin, for example, updatePlugins.xml. The file can be on the same server as your custom plugins, or on a dedicated one.
Click OK in the Custom Plugin Repositories dialog to save the list of plugin repositories.
Click OK in the Settings/Preferences dialog to apply the changes.
When you search for plugins, IntelliJ IDEA will show you results both from the default JetBrains Plugin Repository and any custom repositories that you specify. To browse only a certain custom plugin repository, type followed by the URL of the repository in the search field on the Marketplace tab of the Plugins page. For example:
repository:http://plugins.example.com:8080/updatePlugins.xml myPlugin
Alternatively, you can add your custom plugin repositories using the property:
From the main menu, select .
Add the property to the platform properties file and specify the URL of the XML file that describes your plugin. For example:
idea.plugin.hosts="http://plugins.example.com:8080/updatePlugins.xml"
To add multiple URLs, separate them with semicolons .
Restart IntelliJ IDEA.
You may want to replace the default JetBrains Plugin Repository with your custom plugin repository. This can be helpful if you want only your custom repository plugins to be available from IntelliJ IDEA.
Replace the default plugin repository
From the main menu, select .
Add the property to the platform properties file and specify the URL of the application that can properly handle requests from IntelliJ IDEA, that is, act as the default plugin repository application instead of JetBrains Plugin Repository.
In particular, it should handle the following requests:
Restart IntelliJ IDEA.
If you replace the default plugin repository, the search field on the Marketplace tab of the Plugins dialog will browse only the plugins in the new default repository and any custom repositories that you add.
Productivity tips
Filter and sort search results
Type a forward slash in the search string to see options for filtering and sorting search results. For example, you can add the following options to your search string to list only language-related plugins and sort them by the number of downloads:
/tag:Languages /sortBy:downloads
Last modified: 09 September 2022
Learn IDE featuresWork offline
Docker connection options for different docker daemons
As of v2022.2, IntelliJ IDEA integrates with Colima and Rancher to support more options for establishing connections to a Docker daemon.
Kubernetes
Kubernetes and Telepresence integration
The Kubernetes plugin for IntelliJ IDEA 2022.2 provides integration with the Telepresence tool in order to intercept HTTP requests from services in the Kubernetes cluster and route them to your service running locally. This allows you to debug those services more easily and run only the required subset of services locally.
QA tools
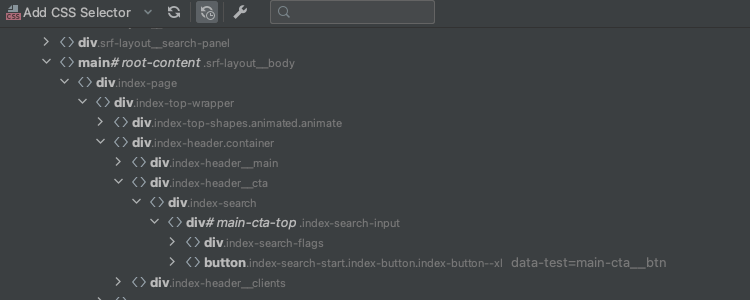
Improved web page structure in the Page Object Editor
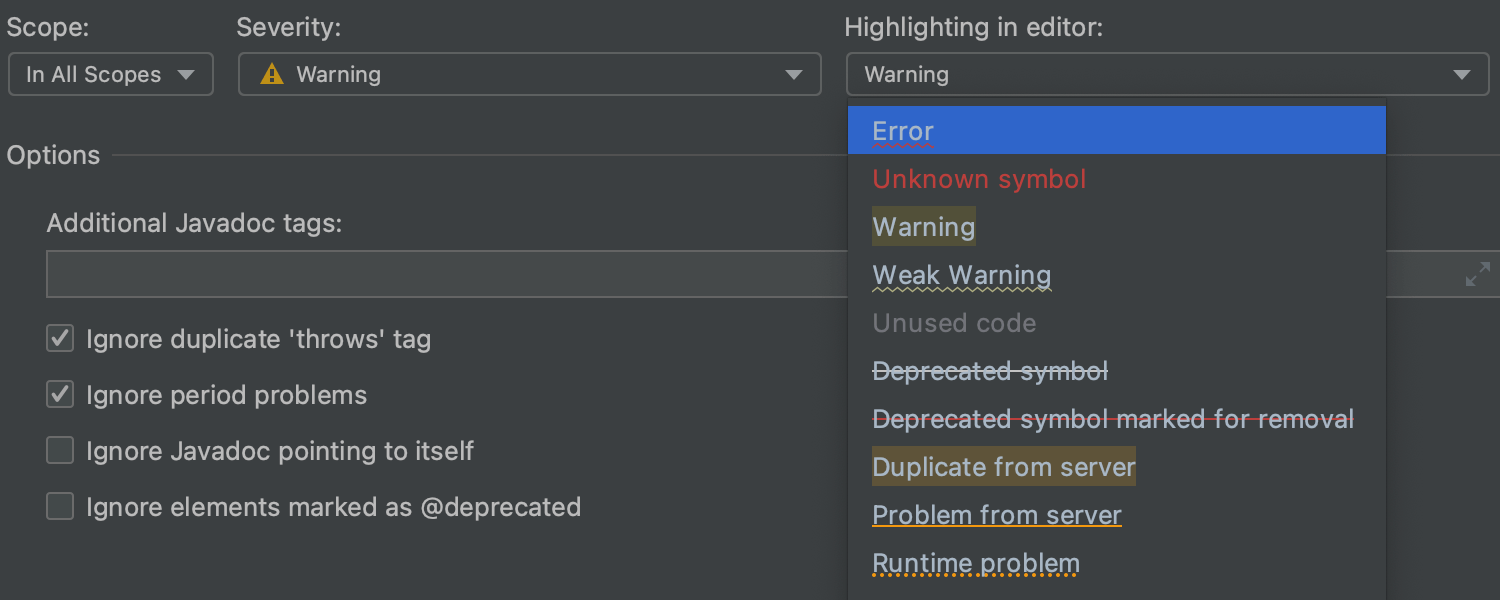
The web page structure UI has been significantly improved. Now you can comfortably read the most important parts, such as the tag name, the ID, and applied CSS classes, thanks to the text format highlighting.

Easy navigation via gutter icons
Now you can easily navigate back to a page element by simply clicking on its icon in the gutter.
Page object naming from URL
When creating a new page object file, the wizard now offers an optional URL field. If the web address is included, the wizard suggests a page object file name based on the link address. Also, the inserted URL is automatically loaded when the Page Object Editor opens.
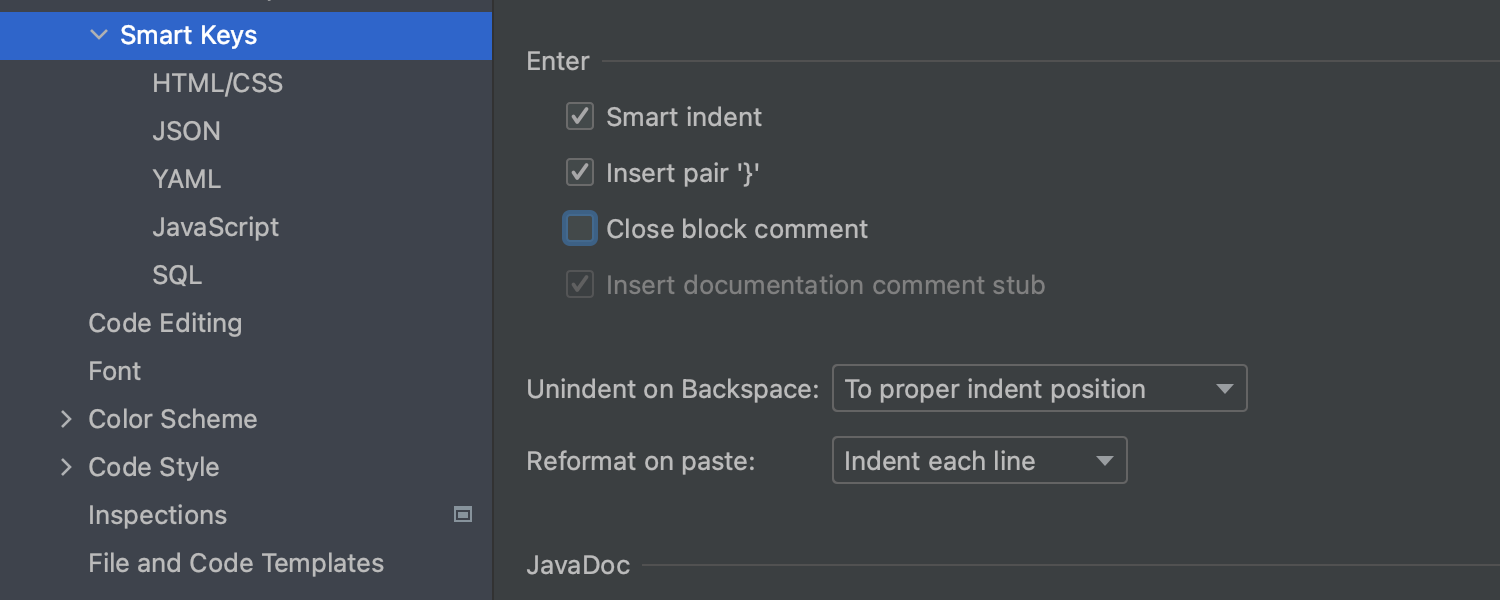
Automatic caret movement to the ends of code blocks
When adding new page elements to your code, the caret now automatically moves to the end of the added code block, so you can easily navigate it and simply continue editing.
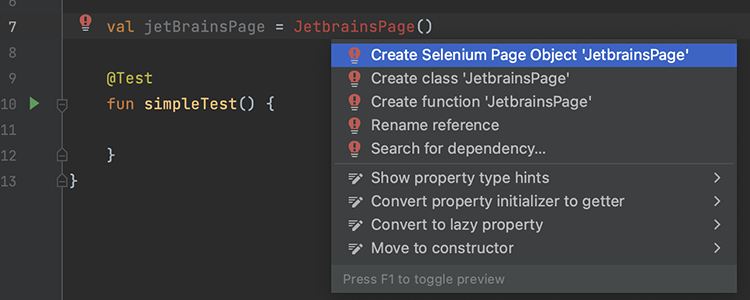
Create a new page object from the context menu
Whenever you type a new non-referenced page object class when working on an existing one, you can fix the unresolved code warning by simply navigating to the warning’s context menu and creating a new page object.
Database tools
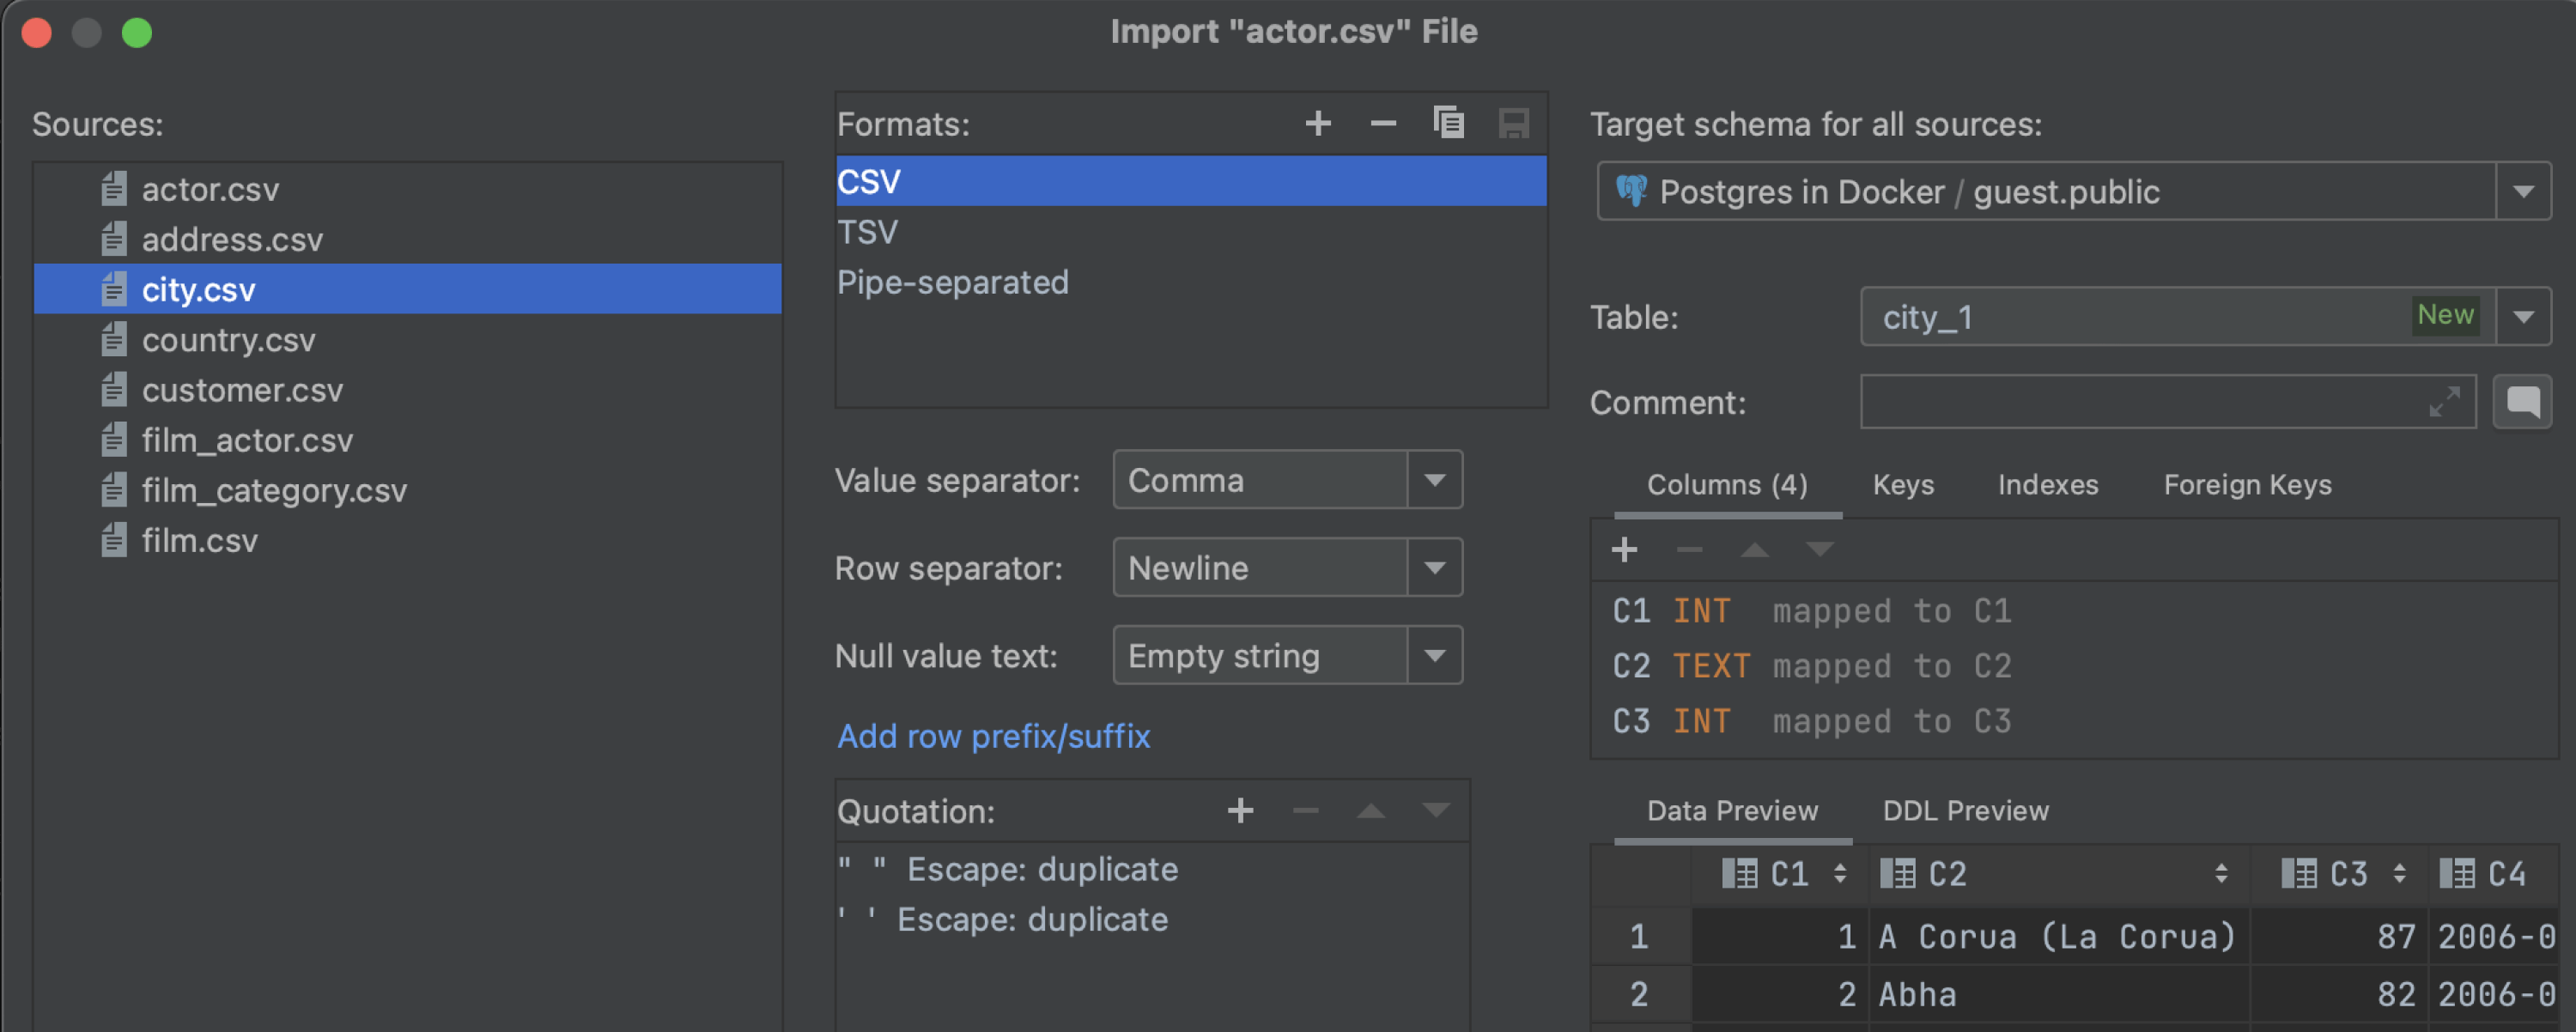
Option to import multiple CSV files
For v2022.2, we’ve enhanced the file importing process by implementing the ability to select several CSV files and import them at once.
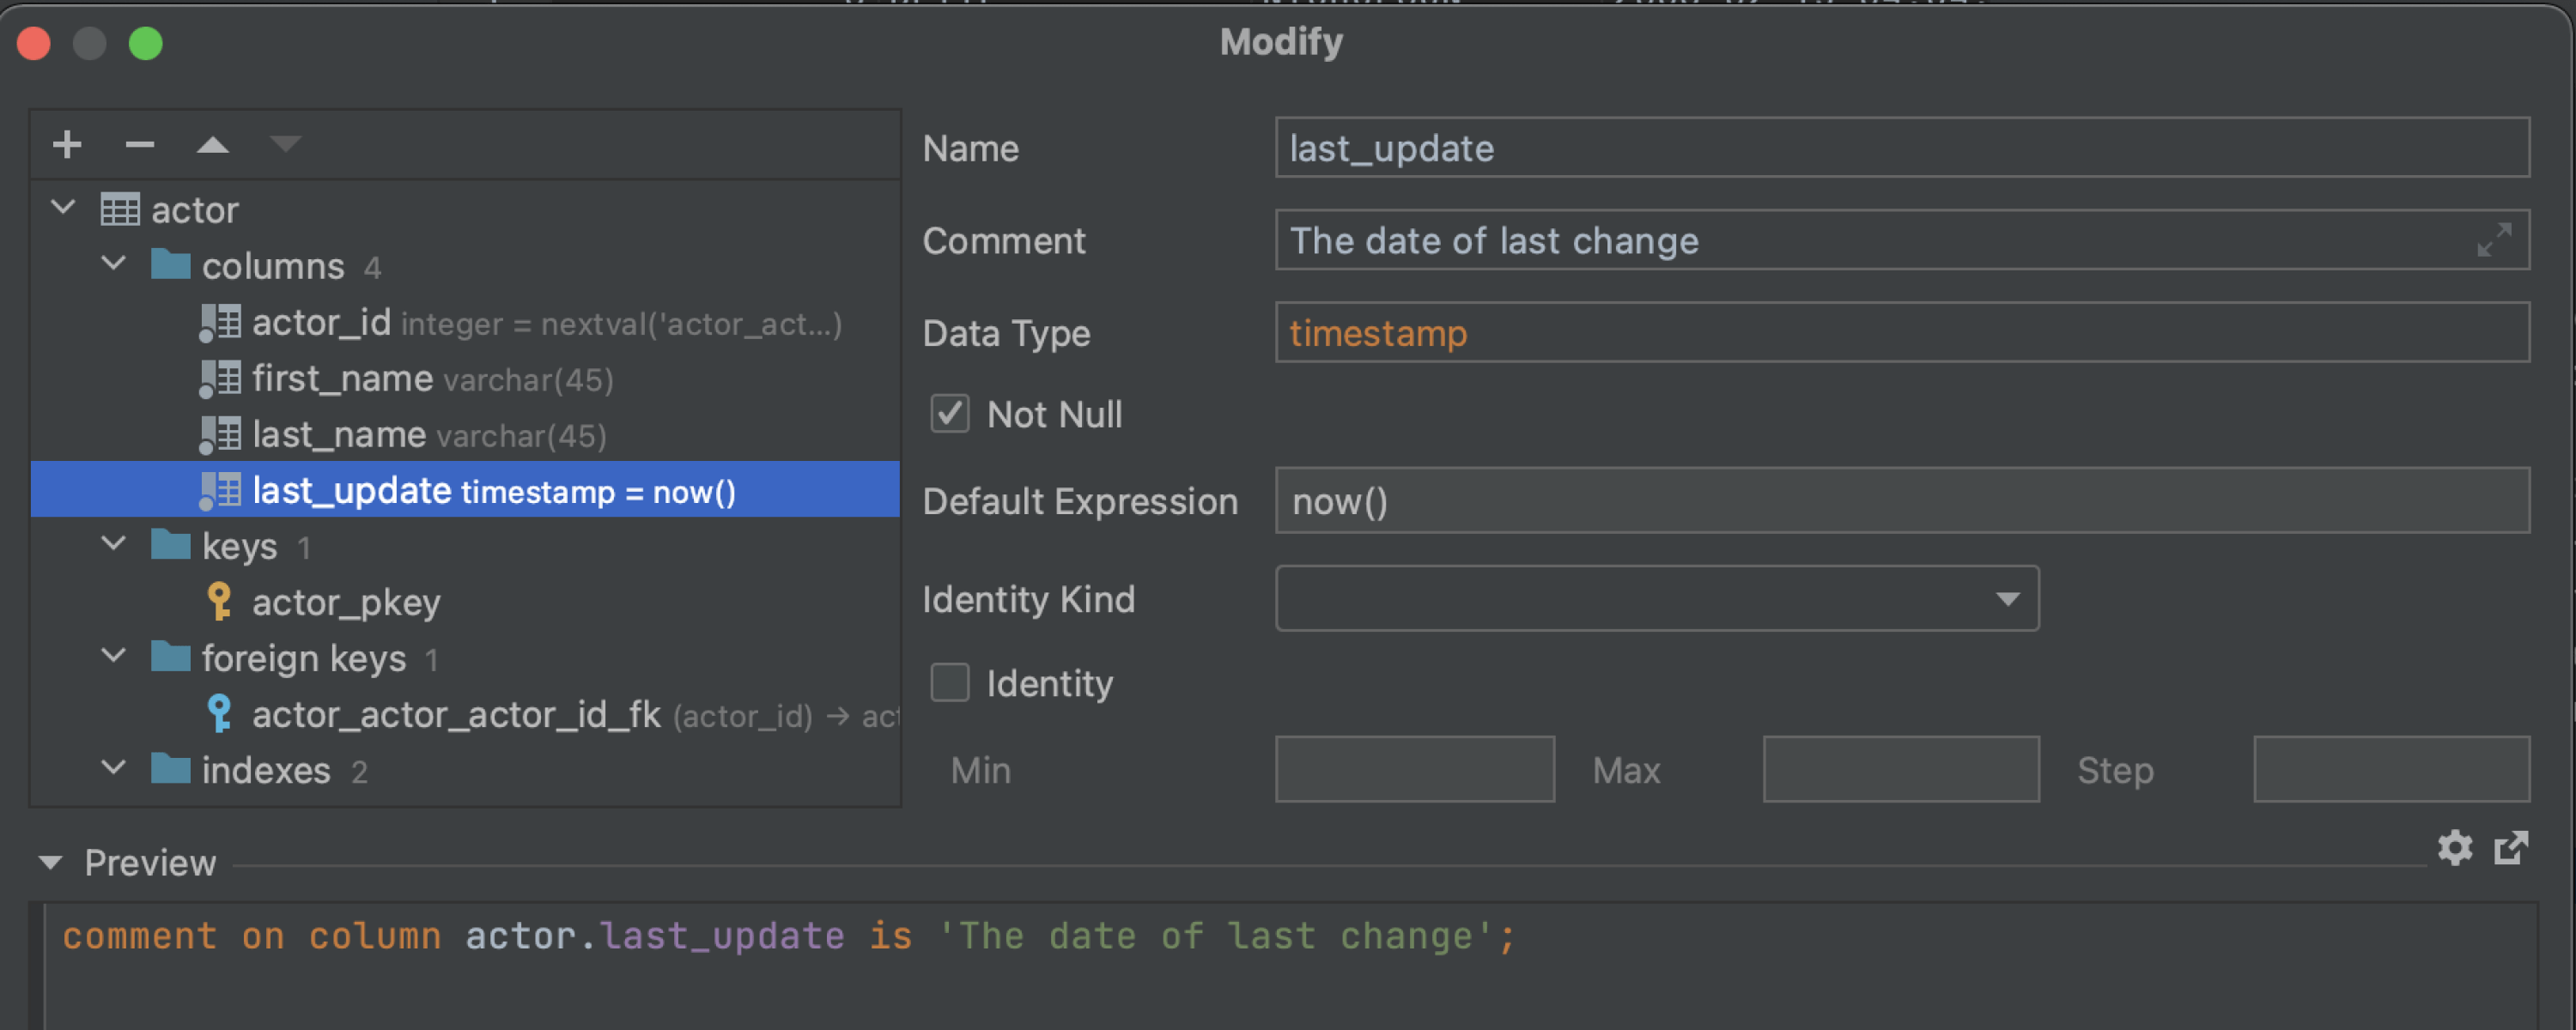
New UI for the Modify dialog
The new UI for the Modify dialog has become the default option. Starting with version 2022.2, all of a table’s child objects can be added and edited using this new UI. The old UI will remain available via the context menu.
Learn more
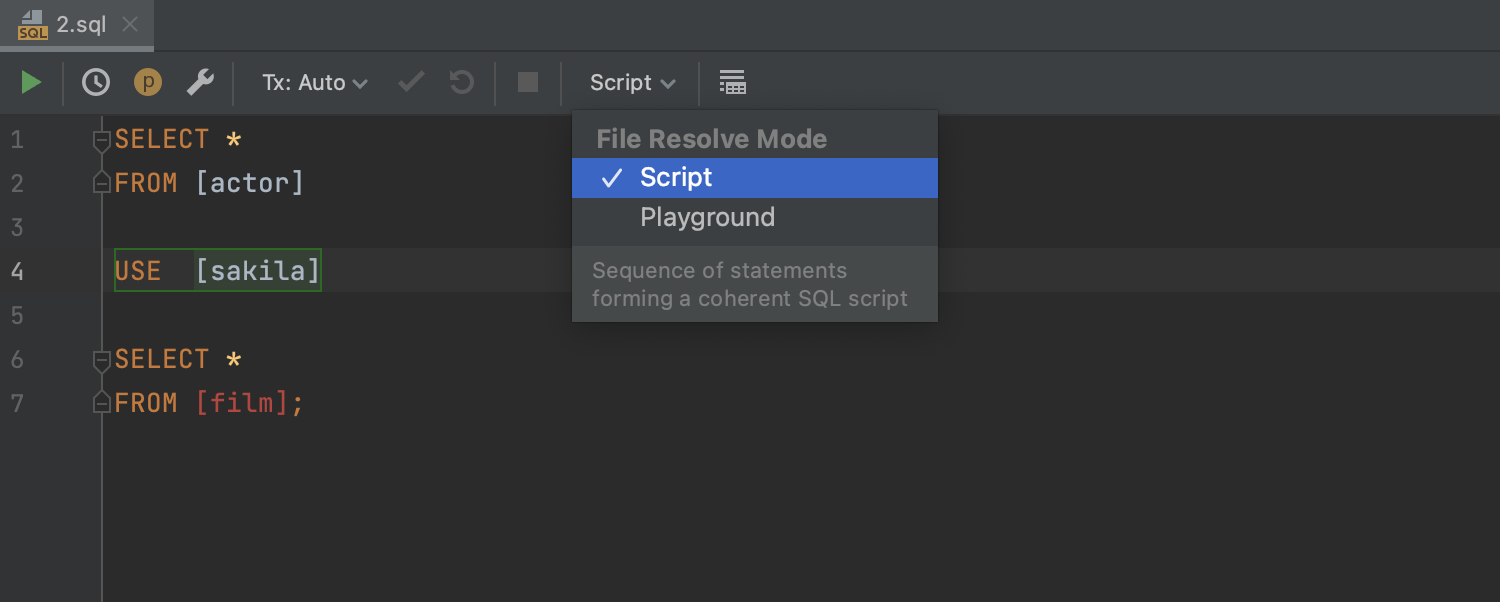
Playground and Script resolve modes
To ensure that database objects in SQL scripts are resolved more precisely, we’ve implemented two resolve modes: Playground and Script. The first one is the better option if your file is just a set of unconnected queries that are independent of each other and have no particular sequence. The second is better when your queries have sequential logic and should be run as a single script.
Learn more
Web development
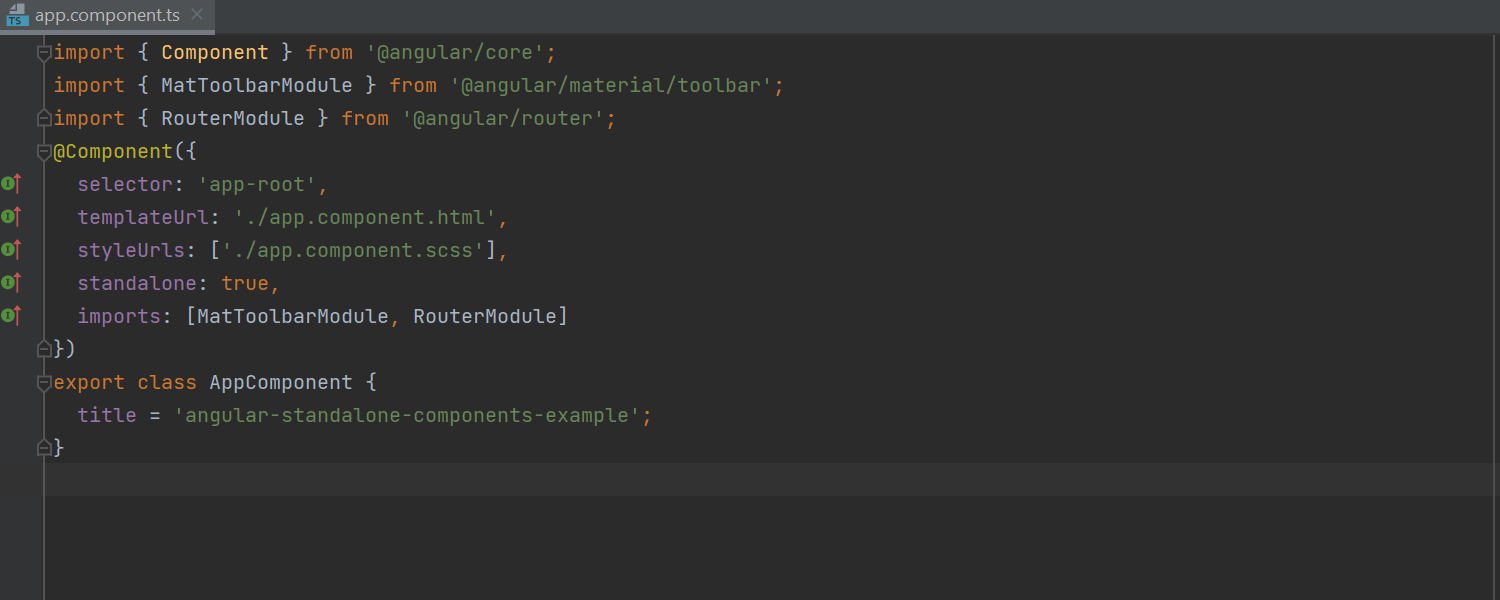
Support for Angular standalone components
We’ve been actively working on support for Angular 14 in IntelliJ IDEA 2022.2. The most important addition we’ve made in this release is support for Angular standalone components. IntelliJ IDEA now properly recognizes components, directives, and pipes marked as .
Improved support for Vue 3
IntelliJ IDEA 2022.2 provides better support for Vue 3. For example, it now understands type narrowing in directives. Also, support for Pinia, the Vue team’s recommended state management solution that works as a global store, has been improved. Both completion and resolve now work in Vue with the Pinia library, and you can navigate to state properties and actions defined in the store.

IntelliJ IDEA 2022.2 comes bundled with TypeScript 4.7, supporting new language features like moduleSuffixes and ESM in Node.js. It will automatically insert the .js extension to the import statement if the module is set to node16 or nodenext in your tsconfig.json file. Additionally, the IDE supports the typesVersions field in package.json files.
Other
- The Android plugin bundled with IntelliJ IDEA now provides all the features of Android Studio Chipmunk, including support for the Android Gradle Plugin (AGP) 7.2.x.


 in the notification area and select which product you want to install.
 and select Available versions.


 and select the directory in the dialog that opens.
 ';} ?>
0 Comments